![](https://kenchan.blog/wp-content/uploads/2021/03/けんちゃん 悲しい-S.jpg)
Evernoteのノートを増やせなくなった…
![](https://kenchan.blog/wp-content/uploads/2021/03/Icon-Mami-100px-喋.jpg)
なんで?
![](https://kenchan.blog/wp-content/uploads/2021/03/けんちゃん 真顔-S.jpg)
課金しないと増やせない仕様になっちゃった!
![](https://kenchan.blog/wp-content/uploads/2021/03/Icon-Mami-100px-喋.jpg)
じゃ、しゃーないな!
![](https://kenchan.blog/wp-content/uploads/2021/03/けんちゃん いじわる-S.jpg)
よし、決めた。
Notionに移行しよう!
ということで、EvernoteからNotionに移行することにしました。2009年からなので、15年間も使い続けてきたEvernoteですが、年払いで9,300円(775円/月)は私には払える金額ではありません。課金しないと実質的に使えない仕様になってしまったので、なごり惜しいですが仕方ありません。
EvernoteからNotionにデータ移行するのは、やってみると思ったより簡単でした。ただ、注意した方がいい点もあったのでこの記事で共有できたらと思います。
注)スマホでデータ移行する方法
まず、押さえておきたい点があります。スマホのNotionアプリからはデータ移行(インポート)できません。(私はAndroidユーザーなので、iPhoneのアプリはわかりません。)では、どうするか?
![](https://kenchan.blog/wp-content/uploads/2021/03/けんちゃん ニコッ-S.jpg)
Chromeなどのブラウザ上で移行します!
スマホのブラウザ上でNotionを表示させたら、あとの移行手順はPCと同じです。(PCもブラウザ上でデータ移行するから。)なので、ここではスマホのブラウザ上でNotionを表示させるところまで説明します。その後の移行手順は、次の章を読んでください。
スマホのブラウザ上でNotionを表示する
![](https://kenchan.blog/wp-content/uploads/2024/08/smartphone-browser-setting-1-1-1024x763.jpg)
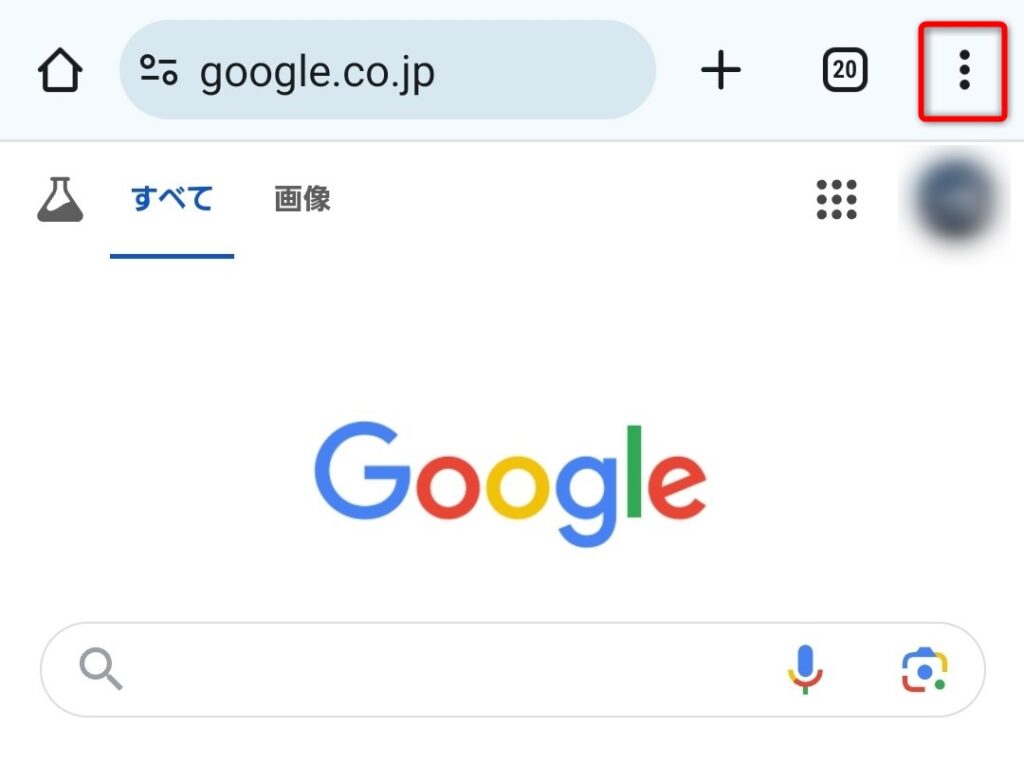
上の画像は、スマホでブラウザ(Chrome)を開いたところです。右上の3点リーダー(…)をクリックして、メニューを出します。
![](https://kenchan.blog/wp-content/uploads/2024/08/smartphone-browser-setting-2-361x1024.jpg)
メニューの「PC版サイト」にチェックを入れます。
![](https://kenchan.blog/wp-content/uploads/2024/08/smartphone-browser-setting-3-1024x677.jpg)
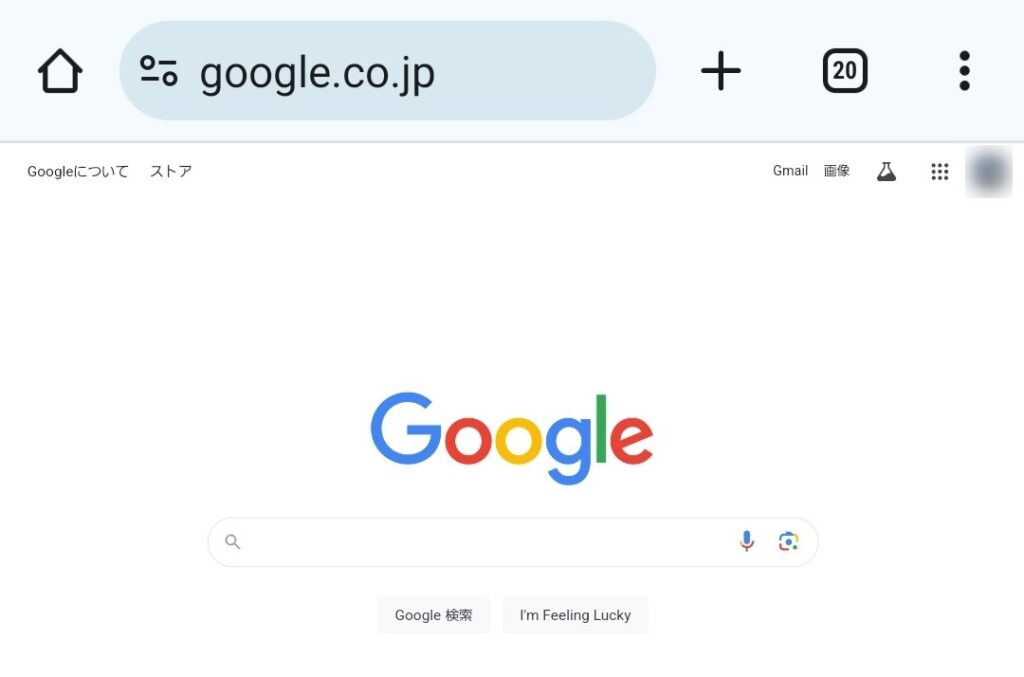
すると、このようにPC版の画面になります。先ほどの画面と少し違うのがわかるでしょうか。
![](https://kenchan.blog/wp-content/uploads/2024/08/smartphone-browser-setting-4-1024x411.jpg)
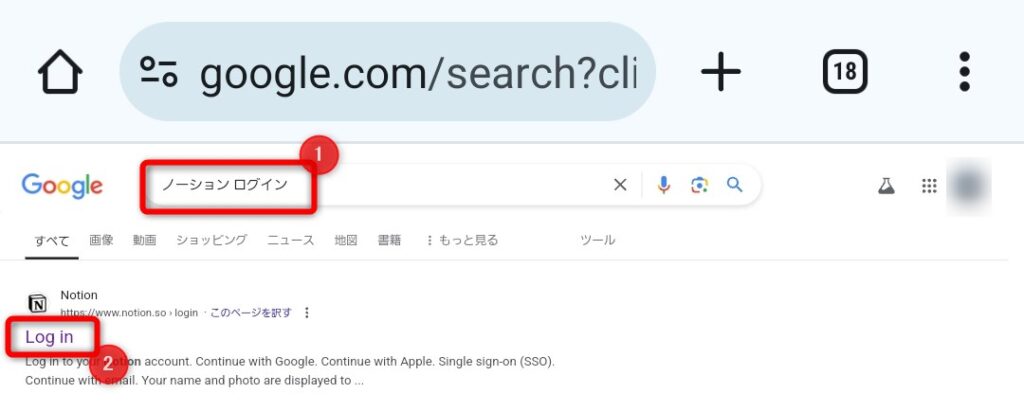
①Notionのログイン画面を検索して、②「Log in」画面に移動して、Notionにログインしてください。これでスマホでデータ移行する準備は終了です。
![](https://kenchan.blog/wp-content/uploads/2021/03/けんちゃん ニコッ-S.jpg)
簡単、簡単!
EvernoteからNotionへのデータ移行方法
EvernoteからNotionにデータを移行したい方のために、簡単な3ステップの手順をご紹介します。これに従えば、スムーズにノートを移行できます。
![](https://kenchan.blog/wp-content/uploads/2024/08/Evernote-to-Notion-1-menu.png)
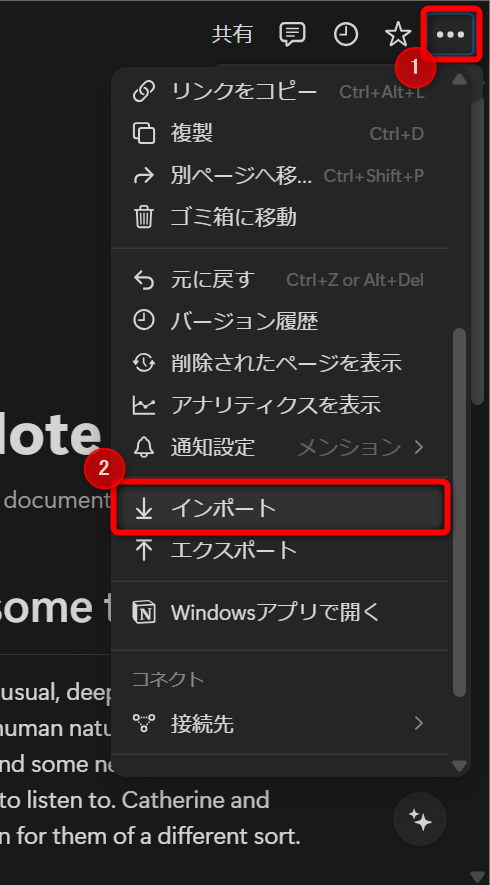
まず、PCのブラウザ上でNotionを開きます。①ページ右上の3点リーダー(…)をクリックし、表示されたメニューの中から②「インポート」を選択します。
![](https://kenchan.blog/wp-content/uploads/2024/08/Evernote-to-Notion-3-sign-in-e1723984034912.png)
![](https://kenchan.blog/wp-content/uploads/2024/08/Evernote-to-Notion-4-permission.png)
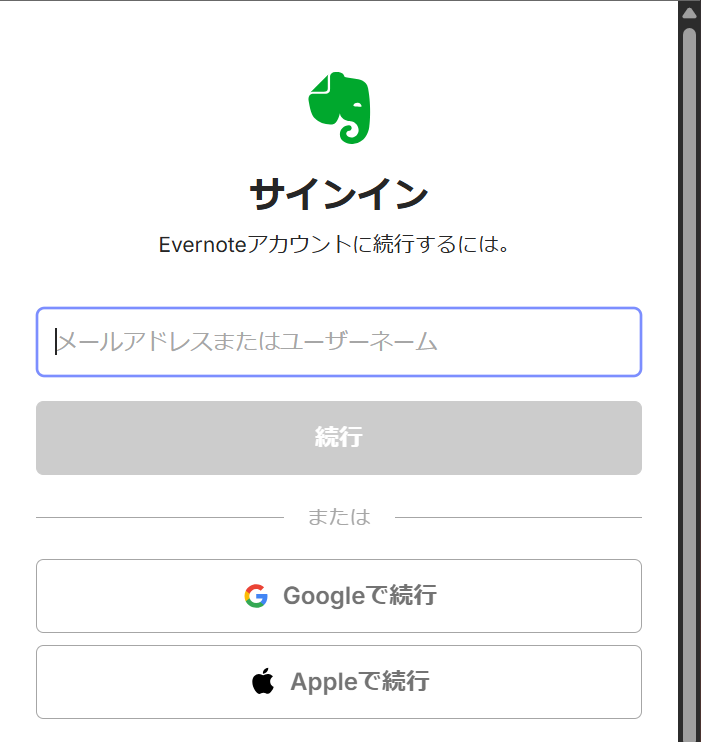
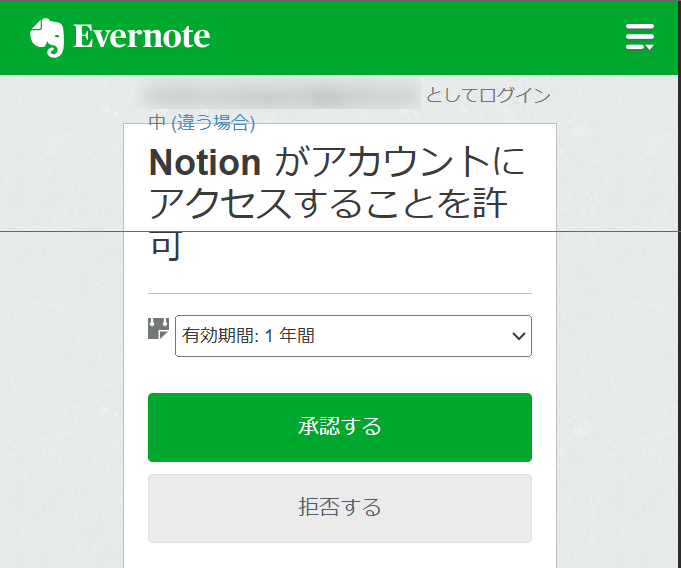
次に、このような画面が出てくるので、Evernoteにサインインします。メールアドレス、Google、またはAppleアカウントでサインインできます。サインイン後、NotionがEvernoteのデータにアクセスするのを許可する画面が表示されるので、「承認する」をクリックしてください。
![](https://kenchan.blog/wp-content/uploads/2024/08/Evernote-to-Notion-5-notebook.png)
サインイン後、Evernoteのノートブック一覧が表示されます。移行したいノートブックにチェックを入れ、「インポート」をクリックします。
![](https://kenchan.blog/wp-content/uploads/2024/08/Evernote-to-Notion-6-import.png)
注意
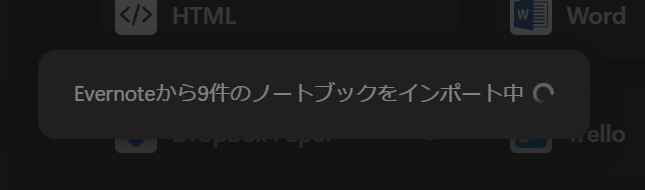
インポートする際、ノートブック数が多かったり、ノートブックのデータが大き過ぎたりすると、かったりすると、上の画面のまま動かなくなることがあります。確実にインポートしたいときは、ノートブックを1つずつインポートすることをおすすめします。
アドバイス
ノートブック内のデータが大きい場合でも、ノートブックを1つずつインポートすれば、時間はかかっても確実にインポートしてくれます。私の場合は、一番下のノートブックは575個もノートが入っていましたが、30分以上かかってインポートできました。
大きなノートブックをインポートする場合は、他の作業と同時進行で行うのがおすすめです。また、ブラウザを閉じてもバックグランドでインポート作業は進んでいるようなので、PCやスマホを閉じて夜にインポートさせておくのもいいと思います。
これで、EvernoteからNotionへのデータ移行は完了です。やってみると、めちゃくちゃ簡単に移行できますので、ぜひお試しください。
![](https://kenchan.blog/wp-content/uploads/2021/03/けんちゃん 苦笑い-S.jpg)
時間はかかるので、ご利用は計画的に!
まとめ(Notionを使ってみて)
Evernoteから違うアプリに移行したい人は、ぜひやってみてください。Notionは無料ですから!(Evernoteは高いけどね。)
![](https://kenchan.blog/wp-content/uploads/2021/03/けんちゃん 真顔-S.jpg)
でも、実際の使い勝手はどうなの?
というところが気になる人もいると思います。Notionに移行して時間は経ってないですが、使った感想としては「Evernoteでできることはできる」といったところです。「タグ」や「Webクリッパー」などの具体的なところも、ほとんど一緒です。むしろ、Notionの方が優れていると感じたところもありました。そのあたりのことを次回の記事で紹介できればと思います。
少しでも参考になったら、下の「♡」「コメント」をくれると嬉しいです!質問も大歓迎です!
コメント